
티스토리 뷰
iOS Swift + UIKit
iOS Swift UIContextMenuInteraction 꾹 눌러서 나오는 메뉴 만들기 (Long press menu tableview)
GonsLab 2021. 1. 26. 09:17728x90
반응형
오늘은 롱 프레스 메뉴를 만들어보겠습니다.
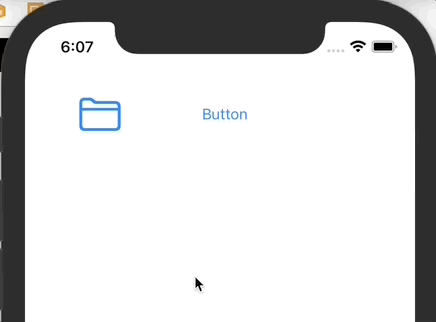
버튼을 하나 만들고요.
@IBOutlet var myButton: UIButton!
viewDidLoad 에 인터렉션을 만들고 버튼에 추가해주세요.
let btnInteraction = UIContextMenuInteraction(delegate: self)
myButton.addInteraction(btnInteraction)
그러면 이런식으로 델리게이트 상속 받으라고 나옵니다. 빨간원 누르고 Fix 눌러서 델리게이트와 함수를 추가해주세요.

이 함수가 추가되셨을텐데 여기 안에다가 메뉴를 만들어서 넣으면 됩니다.
func contextMenuInteraction(_ interaction: UIContextMenuInteraction, configurationForMenuAtLocation location: CGPoint) -> UIContextMenuConfiguration? {

}
이렇게 간단하게 버튼 하나만 만들어서 실행해보겠습니다.
    func contextMenuInteraction(_ interaction: UIContextMenuInteraction, configurationForMenuAtLocation location: CGPoint) -> UIContextMenuConfiguration? {


        return UIContextMenuConfiguration(identifier: nil, previewProvider: nil) { (_: [UIMenuElement]) -> UIMenu? in

            let btn1 = UIAction(title: "좋아요", image: UIImage(systemName: "hand.thumbsup")) { (UIAction) in
                print("좋아요 클릭됨")
            }

            return UIMenu(children: [btn1])
        }
    }
잘 나오네요.

이미지뷰도 할 수 있습니다.
@IBOutlet var myImageView: UIImageView!
이미지뷰는 터치되도록 설정을 해줘야합니다.
let imgInteraction = UIContextMenuInteraction(delegate: self)
myImageView.addInteraction(imgInteraction)
//이미지뷰 터치되도록 설정
myImageView.isUserInteractionEnabled = true
이번엔 메뉴에 버튼 2개를 넣어보겠습니다.
            return UIContextMenuConfiguration(identifier: nil, previewProvider: nil) { (_: [UIMenuElement]) -> UIMenu? in

                var children: [UIMenuElement] = []

                let btn1 = UIAction(title: "수정") { _ in
                    print("수정 클릭됨")
                }

                let btn2 = UIAction(title: "삭제", image: UIImage(systemName: "delete.left") ,attributes: .destructive) { _ in
                    print("삭제 클릭됨")
                }

                children.append(btn1)
                children.append(btn2)

                return UIMenu(title: "이미지뷰 인터렉션 입니다.", options: .displayInline, children: children)

            }
attributes 를 .destructive 로 설정해서 빨간색으로 만들 수 있고요
메뉴에 title 을 줄 수도 있습니다.
실행해보겠습니다.
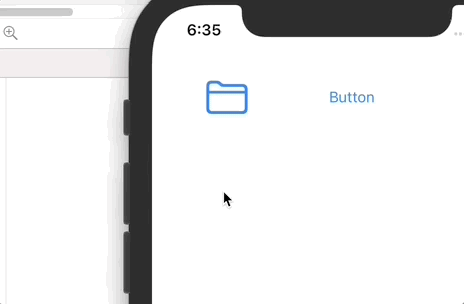
간단하네요.
다음에 더 유익한 내용으로 찾아뵙겠습니다.
감사합니다.
전체 코드 첨부합니다.
import UIKit

class ViewController2: UIViewController {

    @IBOutlet var myButton: UIButton!

    @IBOutlet var myImageView: UIImageView!

    var btnInteraction: UIContextMenuInteraction?

    var imgInteraction: UIContextMenuInteraction?

    override func viewDidLoad() {
        super.viewDidLoad()

        btnInteraction = UIContextMenuInteraction(delegate: self)
        imgInteraction = UIContextMenuInteraction(delegate: self)

        if let interaction = btnInteraction {
            myButton.addInteraction(interaction)
        }

        if let interaction = imgInteraction {
            myImageView.addInteraction(interaction)
            myImageView.isUserInteractionEnabled = true
        }

    }

}

extension ViewController2: UIContextMenuInteractionDelegate {

    func contextMenuInteraction(_ interaction: UIContextMenuInteraction, configurationForMenuAtLocation location: CGPoint) -> UIContextMenuConfiguration? {

        if interaction == btnInteraction {

            return UIContextMenuConfiguration(identifier: nil, previewProvider: nil) { (_: [UIMenuElement]) -> UIMenu? in

                let btn1 = UIAction(title: "좋아요", image: UIImage(systemName: "hand.thumbsup")) { (UIAction) in
                    print("좋아요 클릭됨")
                }

                return UIMenu(children: [btn1])
            }
        } else {

            return UIContextMenuConfiguration(identifier: nil, previewProvider: nil) { (_: [UIMenuElement]) -> UIMenu? in

                var children: [UIMenuElement] = []

                let btn1 = UIAction(title: "수정") { _ in
                    print("수정 클릭됨")
                }

                let btn2 = UIAction(title: "삭제", image: UIImage(systemName: "delete.left") ,attributes: .destructive) { _ in
                    print("삭제 클릭됨")
                }

                children.append(btn1)
                children.append(btn2)

                return UIMenu(title: "이미지뷰 인터렉션 입니다.", children: children)

            }
        }


    }


}
테이블뷰
UITableView
iOS
Swift
Xcode
728x90
반응형
'iOS Swift + UIKit' 카테고리의 다른 글
| iOS Swift 네비게이션바 올리기 hidesBarsOnSwipe Navigation bar (0) | 2021.03.01 |
|---|---|
| iOS Swift Parallax scrolling (패럴랙스 스크롤링) (0) | 2021.02.28 |
| iOS Swift 테이블뷰 스와이프 버튼 만들기 (TableView swipe button) (0) | 2021.01.25 |
| iOS Swift 테이블뷰 삭제 버튼 이름 변경 (TableView delete button title change) (0) | 2021.01.22 |
| iOS Swift 테이블뷰 스와이프 삭제 (TableView swipe delete) (0) | 2021.01.21 |
댓글
공지사항
최근에 올라온 글
최근에 달린 댓글
- Total
- Today
- Yesterday
링크
TAG
- 다국어
- 로컬라이징
- connect
- localizing
- TabView
- Authorization
- macos
- Reject
- 스위프트
- Apple
- SWIFT
- localizable
- Xcode
- 엑스코드
- AppStore
- 인디케이터
- ios
- 리젝
- 현지화
- Language
- TabBar
- permission
- picker
- 심사
- objective-c
- indicator
- swiftUI
- 아이오에스
- 테이블뷰
- 프로그레스
| 일 | 월 | 화 | 수 | 목 | 금 | 토 |
|---|---|---|---|---|---|---|
| 1 | 2 | 3 | 4 | 5 | 6 | 7 |
| 8 | 9 | 10 | 11 | 12 | 13 | 14 |
| 15 | 16 | 17 | 18 | 19 | 20 | 21 |
| 22 | 23 | 24 | 25 | 26 | 27 | 28 |
글 보관함