티스토리 뷰
안녕하세요 Gons 입니다
오늘은 앱이 BackGround 또는 App Switcher Mode 가 됐을 때
화면을 변경해서 중요 정보를 숨길 수 있는 방법을 알려드리겠습니다.
보통 은행 앱들이 개인정보 때문에 이런거 많이 하고 있더라고요.

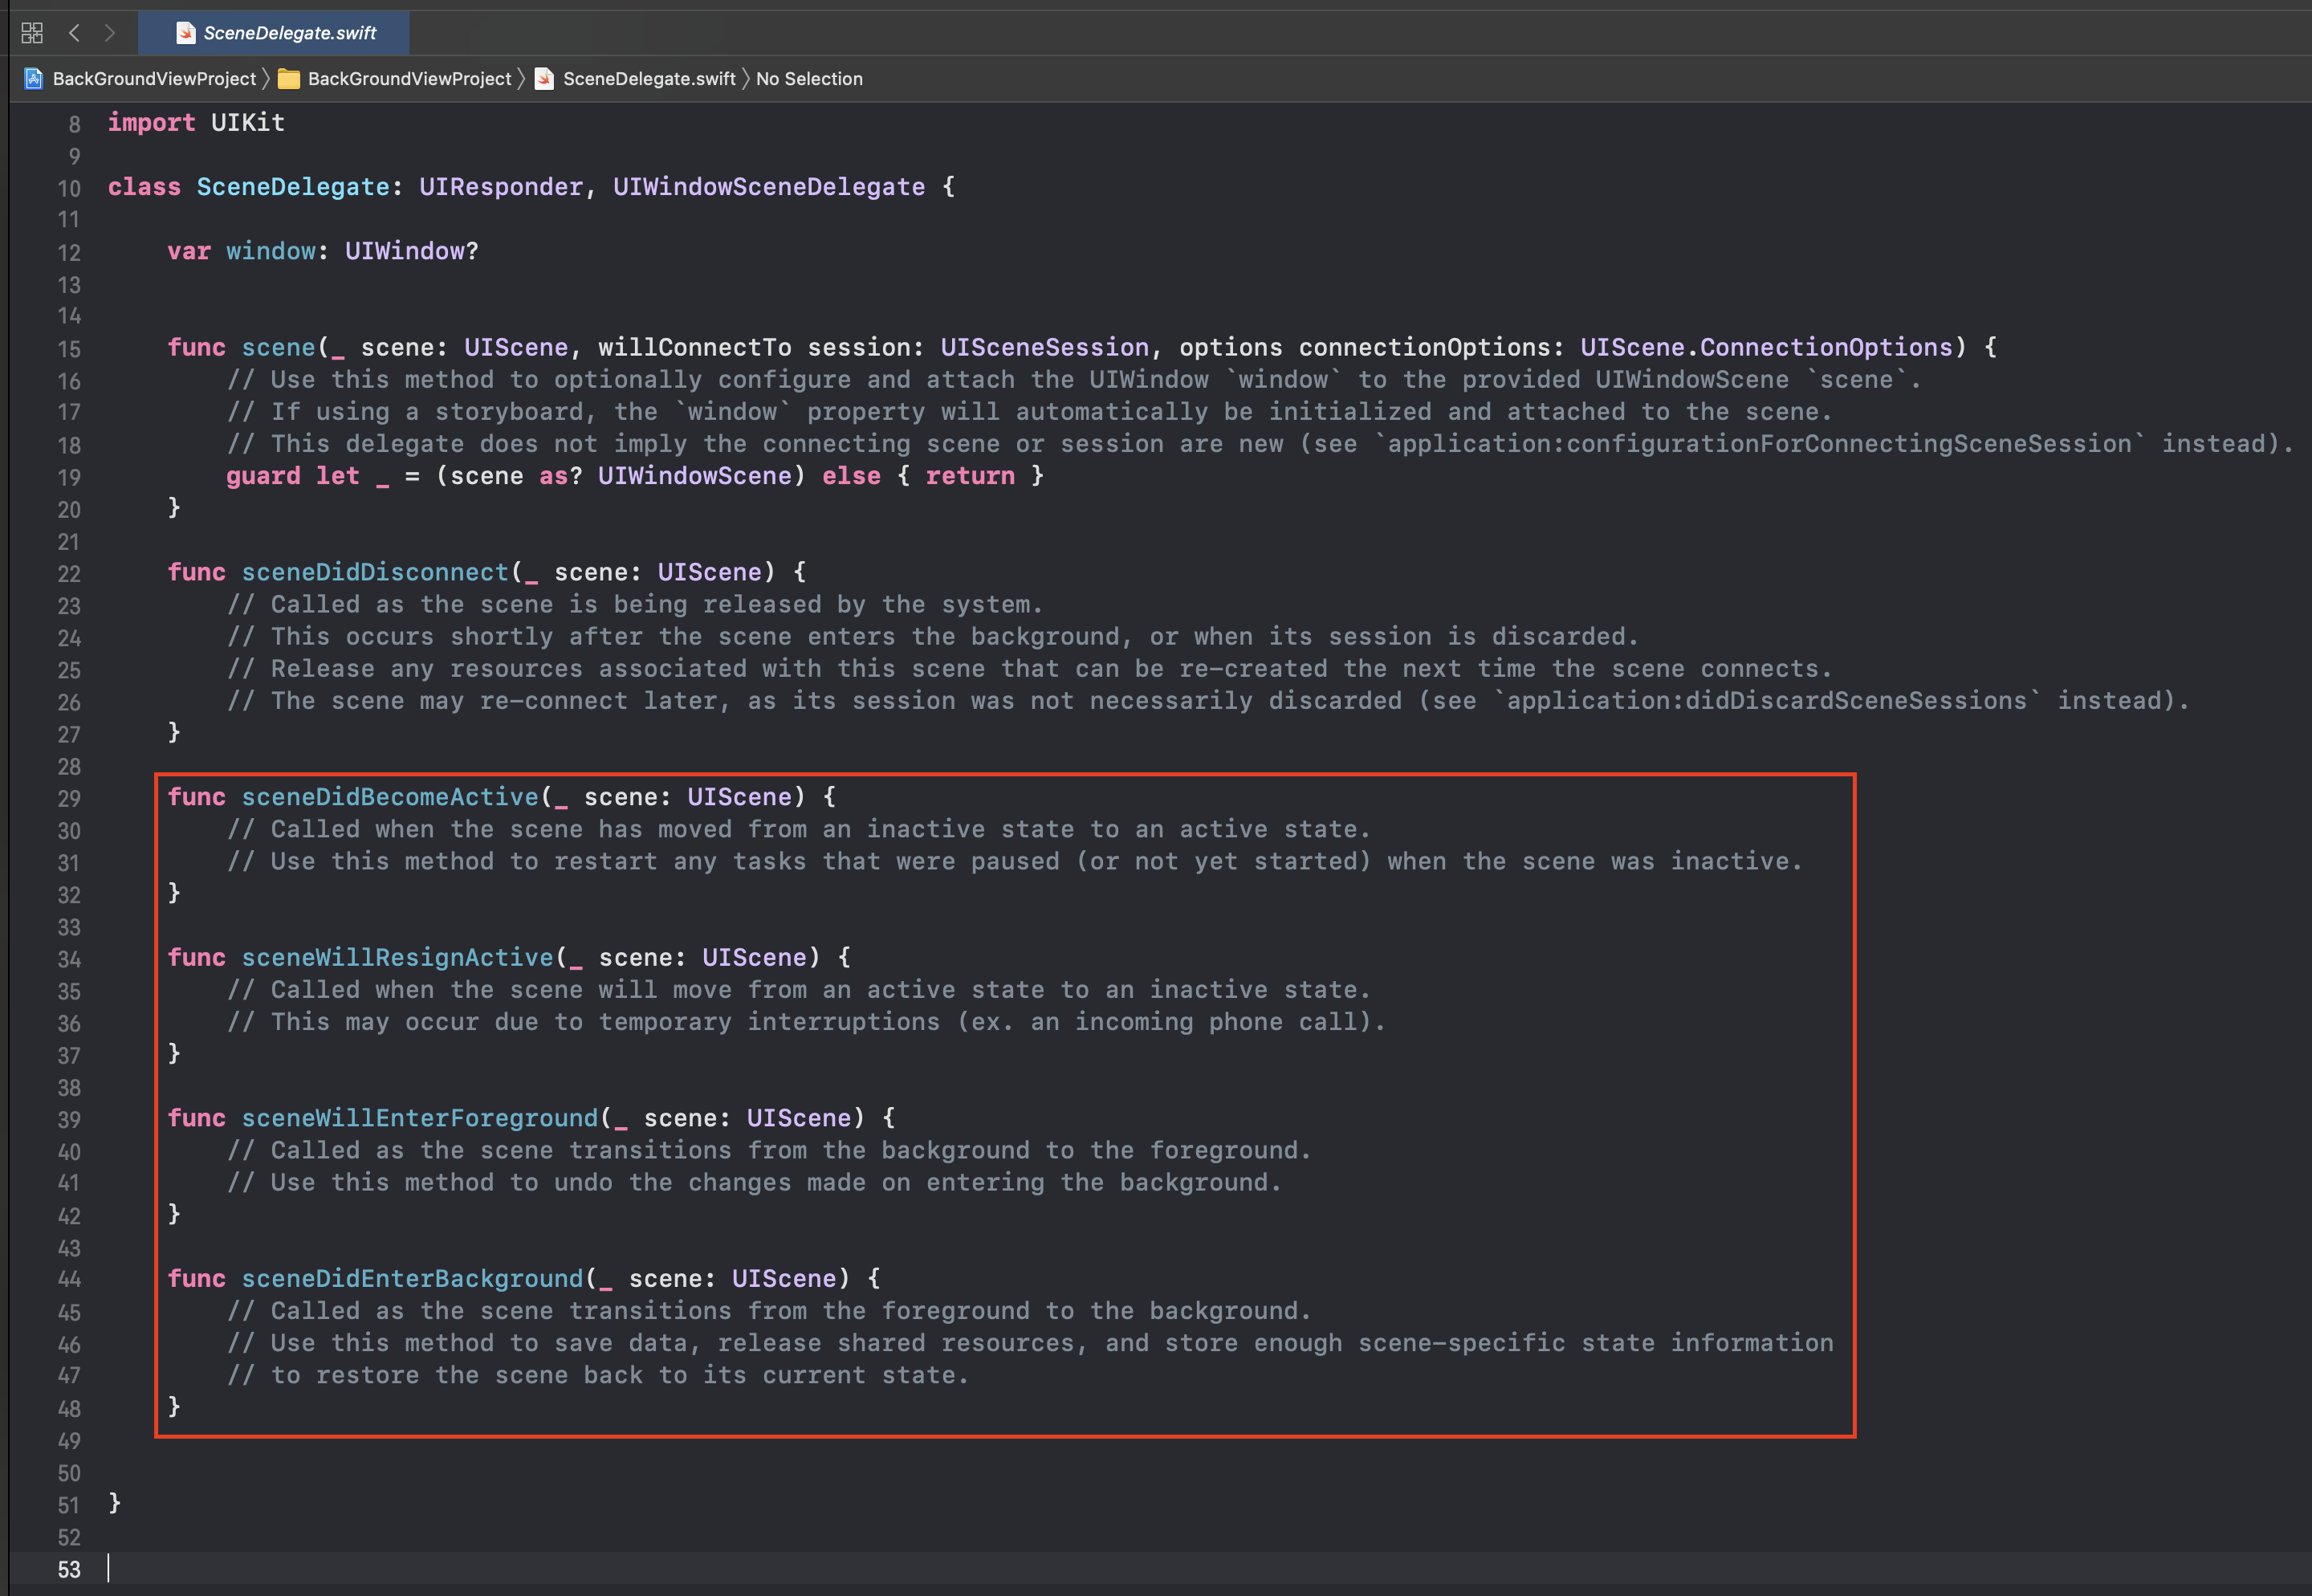
iOS13 이상 기준으로 SceneDelegate.swift 에서 작업을 하겠습니다.

저 4가지 함수를 이용합니다.
각각 설명을 드리자면
sceneDidBecomeActive - 액티브 상태가 됐을 경우
sceneWillResignActive - App Switcher 모드(홈 바 쓸어 올렸을 경우 또는 홈 버튼 모델 홈 버튼 두번 눌렀을 경우)
sceneWillEnterForeground - 백그라운드 상태였다가 돌아왔을 경우
sceneDidEnterBackground - 백그라운드 상태로 갔을 경우
※iOS13 미만도 지원한다면 AppDelegate.swift 에서 작업 하시면 됩니다.
applicationDidBecomeActive
applicationWillResignActive
applicationWillEnterForeground
applicationDidEnterBackground
화면 바꿔줄 함수를 하나 만들어주시고
    func callBackgroundImage(_ bShow: Bool) {

        let TAG_BG_IMG = -101

        let backgroundView = window?.rootViewController?.view.window?.viewWithTag(TAG_BG_IMG)

        if bShow {

            if backgroundView == nil {

                //여기서 보여주고 싶은 뷰 자유롭게 생성
                let bgView = UIView()
                bgView.frame = UIScreen.main.bounds
                bgView.tag = TAG_BG_IMG
                bgView.backgroundColor = .black

                let lbl = UILabel()
                lbl.frame = UIScreen.main.bounds
                lbl.textAlignment = .center
                lbl.font = UIFont.systemFont(ofSize: 30)
                lbl.textColor = .white
                lbl.numberOfLines = 0
                lbl.text = "백그라운드 진입 시\n민감한 정보 숨기기"
                bgView.addSubview(lbl)

                window?.rootViewController?.view.window?.addSubview(bgView)
            }
        } else {

            if let backgroundView = backgroundView {
                backgroundView.removeFromSuperview()
            }
        }
    }
저는 간단하게 검은 화면에 글자만 넣었습니다.
보여주고 싶은 화면을 자유롭게 만들어보세요.
앱 상태에 따라 함수를 불러줍니다.
    func sceneDidBecomeActive(_ scene: UIScene) {
        print("SceneDelegate - sceneDidBecomeActive 켜지기 전 2 (App Switcher 모드 였다가 돌아올 때)")
        callBackgroundImage(false)
    }

    func sceneWillResignActive(_ scene: UIScene) {
        print("SceneDelegate - sceneWillResignActive - 쓸어 올렸을 때, App Switcher 모드")
        callBackgroundImage(true)
    }

    func sceneWillEnterForeground(_ scene: UIScene) {
        print("SceneDelegate - sceneWillEnterForeground - 켜지기 전 1 (완전 백그라운드로 갔다 다시 돌아올 때) 백그라운드로 갔다가 바로 오면 여기 안탐. 백그라운드 1초 있다가 켜야 여기 탐")
        callBackgroundImage(false)
    }

    func sceneDidEnterBackground(_ scene: UIScene) {
        print("SceneDelegate - sceneDidEnterBackground - 백그라운드로 갔을 때, 홈 눌렀을 때")
        callBackgroundImage(true)
    }
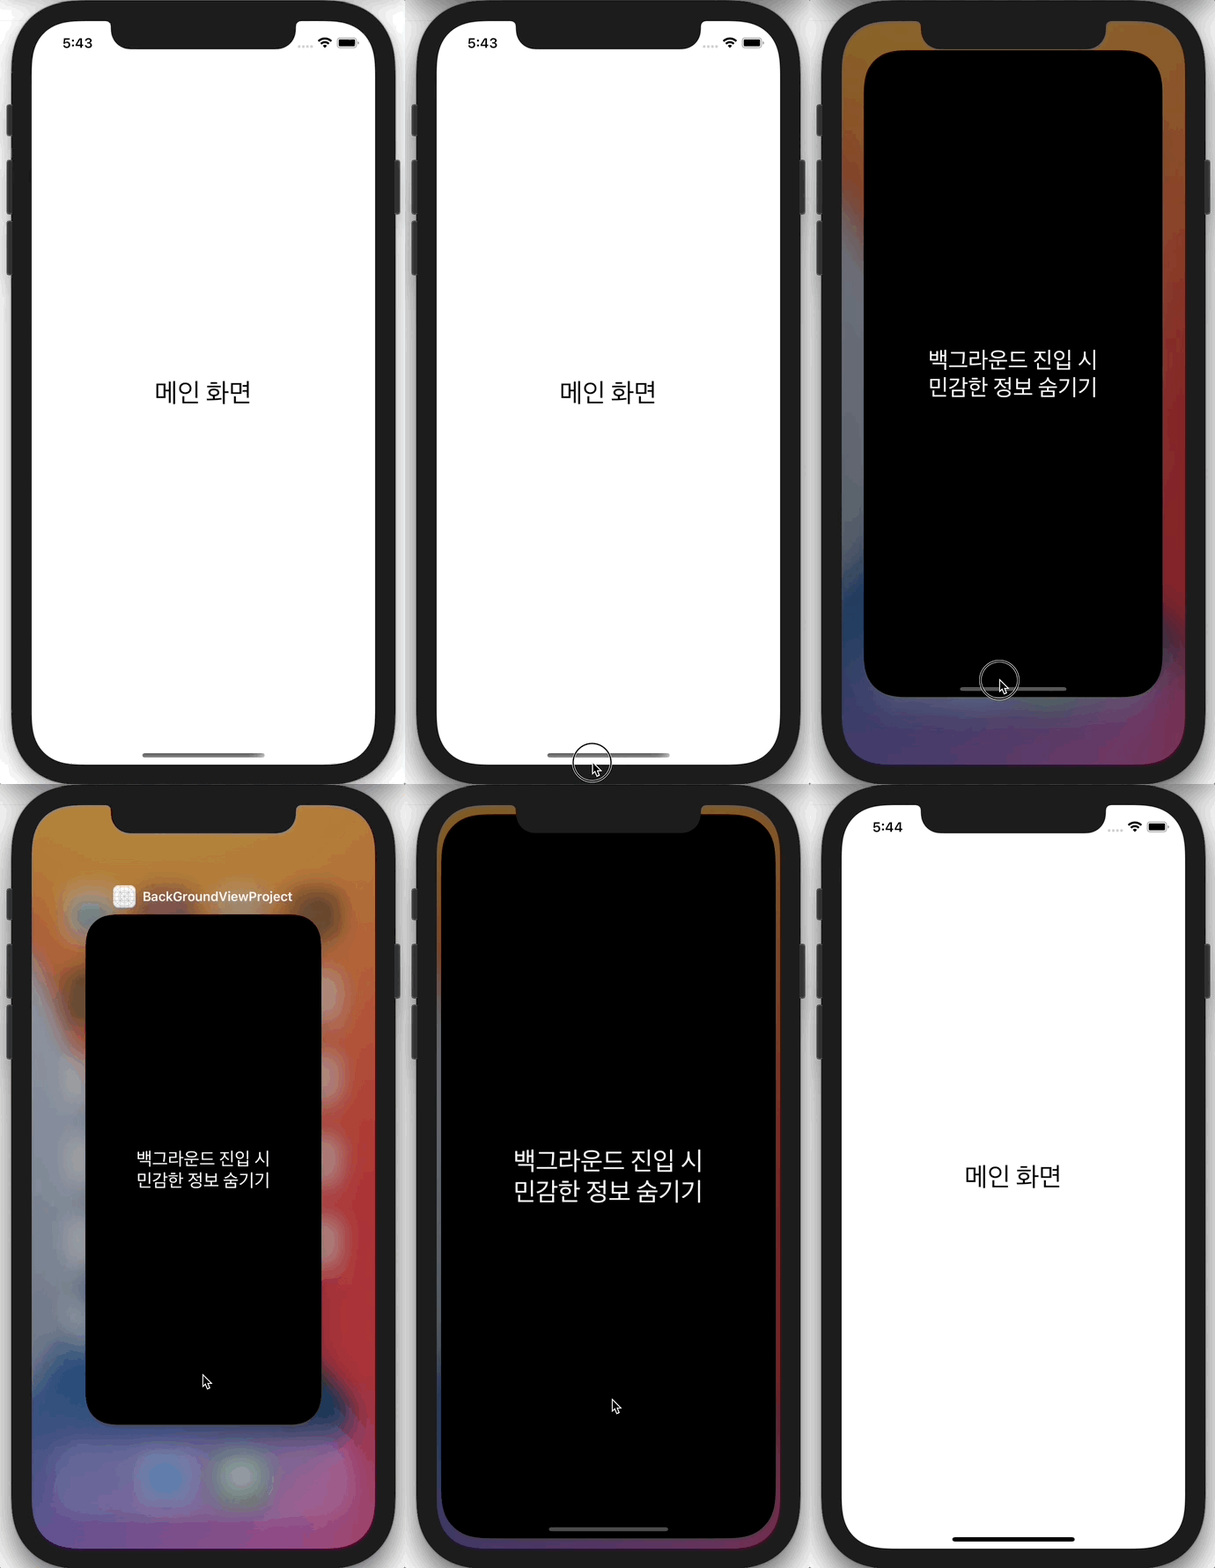
바로 실행해보겠습니다.

잘 나오네요.
끝.
저는 다음에 더 필요한 내용으로 돌아오겠습니다.
감사합니다.
Xcode iOS Swift
'iOS Swift + UIKit' 카테고리의 다른 글
| iOS Swift 다국어 설정 - Code Localizing (0) | 2021.04.02 |
|---|---|
| iOS Swift 다국어 설정 - Storyboard Localizing (0) | 2021.04.01 |
| iOS Swift 네비게이션바 올리기 hidesBarsOnSwipe Navigation bar (0) | 2021.03.01 |
| iOS Swift Parallax scrolling (패럴랙스 스크롤링) (0) | 2021.02.28 |
| iOS Swift UIContextMenuInteraction 꾹 눌러서 나오는 메뉴 만들기 (Long press menu tableview) (0) | 2021.01.26 |
- Total
- Today
- Yesterday
- picker
- 테이블뷰
- ios
- swiftUI
- TabView
- 엑스코드
- Authorization
- 스위프트
- 프로그레스
- 로컬라이징
- 다국어
- Reject
- Xcode
- localizing
- objective-c
- SWIFT
- connect
- 심사
- localizable
- Apple
- 인디케이터
- 아이오에스
- permission
- 현지화
- 리젝
- AppStore
- macos
- TabBar
- indicator
- Language
| 일 | 월 | 화 | 수 | 목 | 금 | 토 |
|---|---|---|---|---|---|---|
| 1 | 2 | 3 | 4 | 5 | 6 | 7 |
| 8 | 9 | 10 | 11 | 12 | 13 | 14 |
| 15 | 16 | 17 | 18 | 19 | 20 | 21 |
| 22 | 23 | 24 | 25 | 26 | 27 | 28 |
